Behind the Scenes: Crostini with Caramelized Apples, Fontina + Rosemary [Part 2]

A couple weeks ago, I shared behind the scenes photos taken by Anna Guziak (if you missed that post, click here). Today’s post includes my photos, tips, and tricks I use when doing a food photoshoot, as well as the recipe for the dish you see in the pictures. (Scroll all the way to the bottom of this post to skip right to the recipe.)
To be honest, I've been hesitant to share photography advice on my blog because I am far from an expert. The more I learn, the more I realize how much I don’t know. Offering advice in this area makes me want to crawl into a closet and hide from the imposter syndrome that lurks in every corner or my mind.
That being said, I’ve had a handful of people ask me about my photography process. I’ve come to realize maybe hearing how I photograph without fancy lighting, a full photography studio, and a myriad of lenses could be helpful. So, I’m learning to push imposter syndrome to the side and talk about what I love, even if I still have a great deal to learn myself.
(It’s worth noting that what I’ve shared below is simply what I do and the equipment I use - it’s not necessarily the way things need to be done or the equipment that has to be used. Do what works for you! This post also focuses mainly on my process of learning photography, so I haven’t included advice on styling, lighting, composition, how a camera works, etc. You can find much of that information by checking out the links I’ve included in the “Resources” section below.)


Camera + Lenses
I currently use a Canon EOS 60d. My very first lens was a 50mm lens. It's often called the "nifty fifty" and is useful for a variety of types of photography. Even now, I use my 50mm about 85% of the time.
Before talking about more equipment, though, let me say this. When you first start learning about camera equipment, it’s easy to get overwhelmed and feel like you need to spend thousands of dollars to create a decent image. You don’t. You can make very clean, crisp images with whatever equipment you have. I have professional photographer friends with tons of great equipment, and that equipment can absolutely enhance what you’re able to do. However, if you are just starting out, I would recommend first learning to use what you have, then upgrade equipment as you become proficient with what you currently own. If all you have right now is a smartphone, practice creating really awesome images on your smartphone. There is so much you can learn about styling, composition, lighting, etc. before even making a camera or lens purchase.
When you learn first with what you have, I personally think you become a better photographer in the long run because you don't use equipment as a crutch. I also have a habit of wanting to dive into a hobby head first, then abandoning that hobby a few months or a year later. So, for the first year I started learning photography, I borrowed a camera from my sister. I wanted to learn how to use it and make sure this was a hobby I’d actually stick with before making any large purchases.
Eventually, I bought a new and upgraded lens (my 50mm lens) to fit the borrowed camera, but I made sure what I purchased would also fit the camera I planned to eventually buy. As I got better and also felt confident this was a hobby that would stick around, I purchased a Canon EOS 60d (and made that purchase when newer Canon products were released, which meant the price of the 60d went down pretty significantly).
About a year after purchasing my camera, I got the 24mm wide angle lens, and another year or so after that, purchased a 100mm macro lens. Since my photography is almost entirely focused on food, these lenses work for me, but if I was doing weddings, portraits, landscapes, etc., I'd change up or add to what I have.
Lighting
Ninety-five percent of the time, I use natural lighting. I’ve taken photos in a number of locations around my house, and have concluded that most of the time the window in my dining room works best. I typically push the dining room table right up against the window and take my pictures there. You can see a few pictures of my setup in the previous “Behind the Scenes” post.
Taking food photography pictures with 2-year-old toddlers running around brings its own set of challenges. They still take a decent nap, so most of the time I work on photo shoots while they’re asleep. If they don’t take a good nap that day or the weather doesn’t cooperate for me to get the right light I need, I hold off and shoot another day. I’m a planner, but in this area (and in many others) my kids have taught me to be more flexible.
With baby number 3 on the way, the chances of all three kids sleeping at the same time during the day are slim, so I’m branching out into the world of artificial lighting. I bought the Lowel Ego Tabletop Light and love it so far. Shooting during the day in natural lighting is still my preference, but the tabletop light gives me the flexibility to schedule photo shoots at night when needed.
Props
Most of the props I own are actual items we use as a family in regular life - utensils, dishes, linens, or the ingredients used to create the dish I’m photographing. At garage sales or on clearance racks, I’ve also collected a handful of items we don’t necessarily use regularly but help add a little more variety to the images.
I love photographing on all white dishware because I think it makes the food really pop. I also have an assortment of glasses, since I love creating drink recipes (especially cocktails). I’ve learned, though, that if I do want to buy new glassware for a photoshoot, I don’t need a set of four. Usually, just one or two glasses are sufficient. (Also, we had soooo many glasses at one point that it was getting ridiculous, so I’ve pared down my stash a little.)
I use a marble pastry board that I use as a backdrop for many of my shoots, as well as an olive wood cutting board, slate cheese board, flour sack towels (my favorite linen to use), and a handful of other odds and ends. I also made a wood backdrop out of a few pieces of plywood, screws, and a bit of paint. (Someday, I'd love to get my hands on a few of these backdrops from Erickson Wood Works.)
My philosophy is the same with props as it is with any other equipment. Use what you have first before making any big purchases. A white foam board and a kitchen towel can help you create a beautiful picture. As you dive into food photography more, keep an eye out for fun props at garage sales, second-hand stores, or the clearance section at stores such as Target or World Market. IKEA also has really inexpensive items that can work great for photo shoots. And when there’s a prop you really want to use in a photoshoot but don’t want to purchase, you can always ask around to see if someone near you is willing to lend you an item (I’ve done this several times before!).

Editing
For editing, I currently use Lightroom, which does all that I need. Maybe someday I'll learn to use Photoshop, but Lightroom is a fantastic product. That being said, for a couple years, I just used iPhoto (gasp!) on my computer and didn't purchase Lightroom until I had grown out of what iPhoto could do. Again, this has forced me to learn how to better take a photo initially, rather than relying too heavily on post-production to fix all my mistakes. Editing software can be incredibly powerful, but your end result will be much better if you use editing software as a tool to enhance an already good photo rather than a band-aid to fix a poorly shot photo.
When it came to learning Lightroom, I read blog posts, watched YouTube tutorials, and Googled “how to do _______________ in Lightroom” more times than I care to admit. Not exactly glamorous, but it’s a process that’s worked for me. There are also affordable online classes and workshops that teach how to use Lightroom or Photoshop (check out Skillshare for starters).
My Learning Process
As far as actually learning how to photograph, you can find a ton of information available for free or at a very low cost to help you get started. Sometimes, though, the benefit of having someone personally answer questions or walk you through how your camera works can make the learning process much less overwhelming. The very first year I started, I took a photography class through my local park district and video chatted a couple professional photographer friends who were willing to teach me what they know. Those video chats were invaluable. I also watched YouTube videos, took a Skillshare class, purchased a food photography book and an ebook, and read a lot of blog posts.
Over the course of four and a half years, I’ve spent about $75 on learning photography. Again, you don’t have to drain your savings account in order to improve. That being said, if you’re able to participate in workshops or classes and invest in other resources right away, go for it! Those opportunities provide a learning experience that self-teaching simply can’t replicate. Hopefully, at some point in the near future, I’ll take more in-person classes and participate in workshops or retreats. But for my family and me right now, despite my impatience and desire to race ahead to learn everything I possibly can as soon as I can, I’ve realized that taking things slowly has been a better, more realistic pace.
Oh, and most importantly? Take photos. Lots of photos. Reading and research will only get you so far. You’ve got to keep shooting.

Resources
There is no shortage of information available about photography. This is an extremely abbreviated list, and I could spend hour after hour adding to it. I've included a handful of links and resources to help you get started.
Blog Posts
"Food Photography Tips for Food Bloggers" from Cookie + Kate
"How I Instagram" from The Fauxmartha
"Fauxtography 101" from The Fauxmartha
"One Pot Butternut Squash Soup shot with an iPhone" from The Fauxmartha
Photography tips and tutorials from White on Rice Couple
"Artificial Lighting Tips for Food Photography" from Pinch of Yum
Additional photography tips and tutorials from Pinch of Yum
Books/eBooks
Food Photography: From Snapshots to Great Shots by Nicole S. Young
Tasty Food Photography by Pinch of Yum (This is one of the first food photography resources I ever used, and it's extremely helpful for beginners.)
YouTube
"Food Photography Tips with Andrew Scrivani"
"Food Photography: Lighting and Compositional Basics" from Andrew Scrivani (Pretty much anything from Andrew Scrivani will be extremely helpful.)
"Tips for Stunning Food Photography with Top With Cinnamon"
Online Classes
Check out Skillshare or Craftsy.com for a variety of affordable online classes.

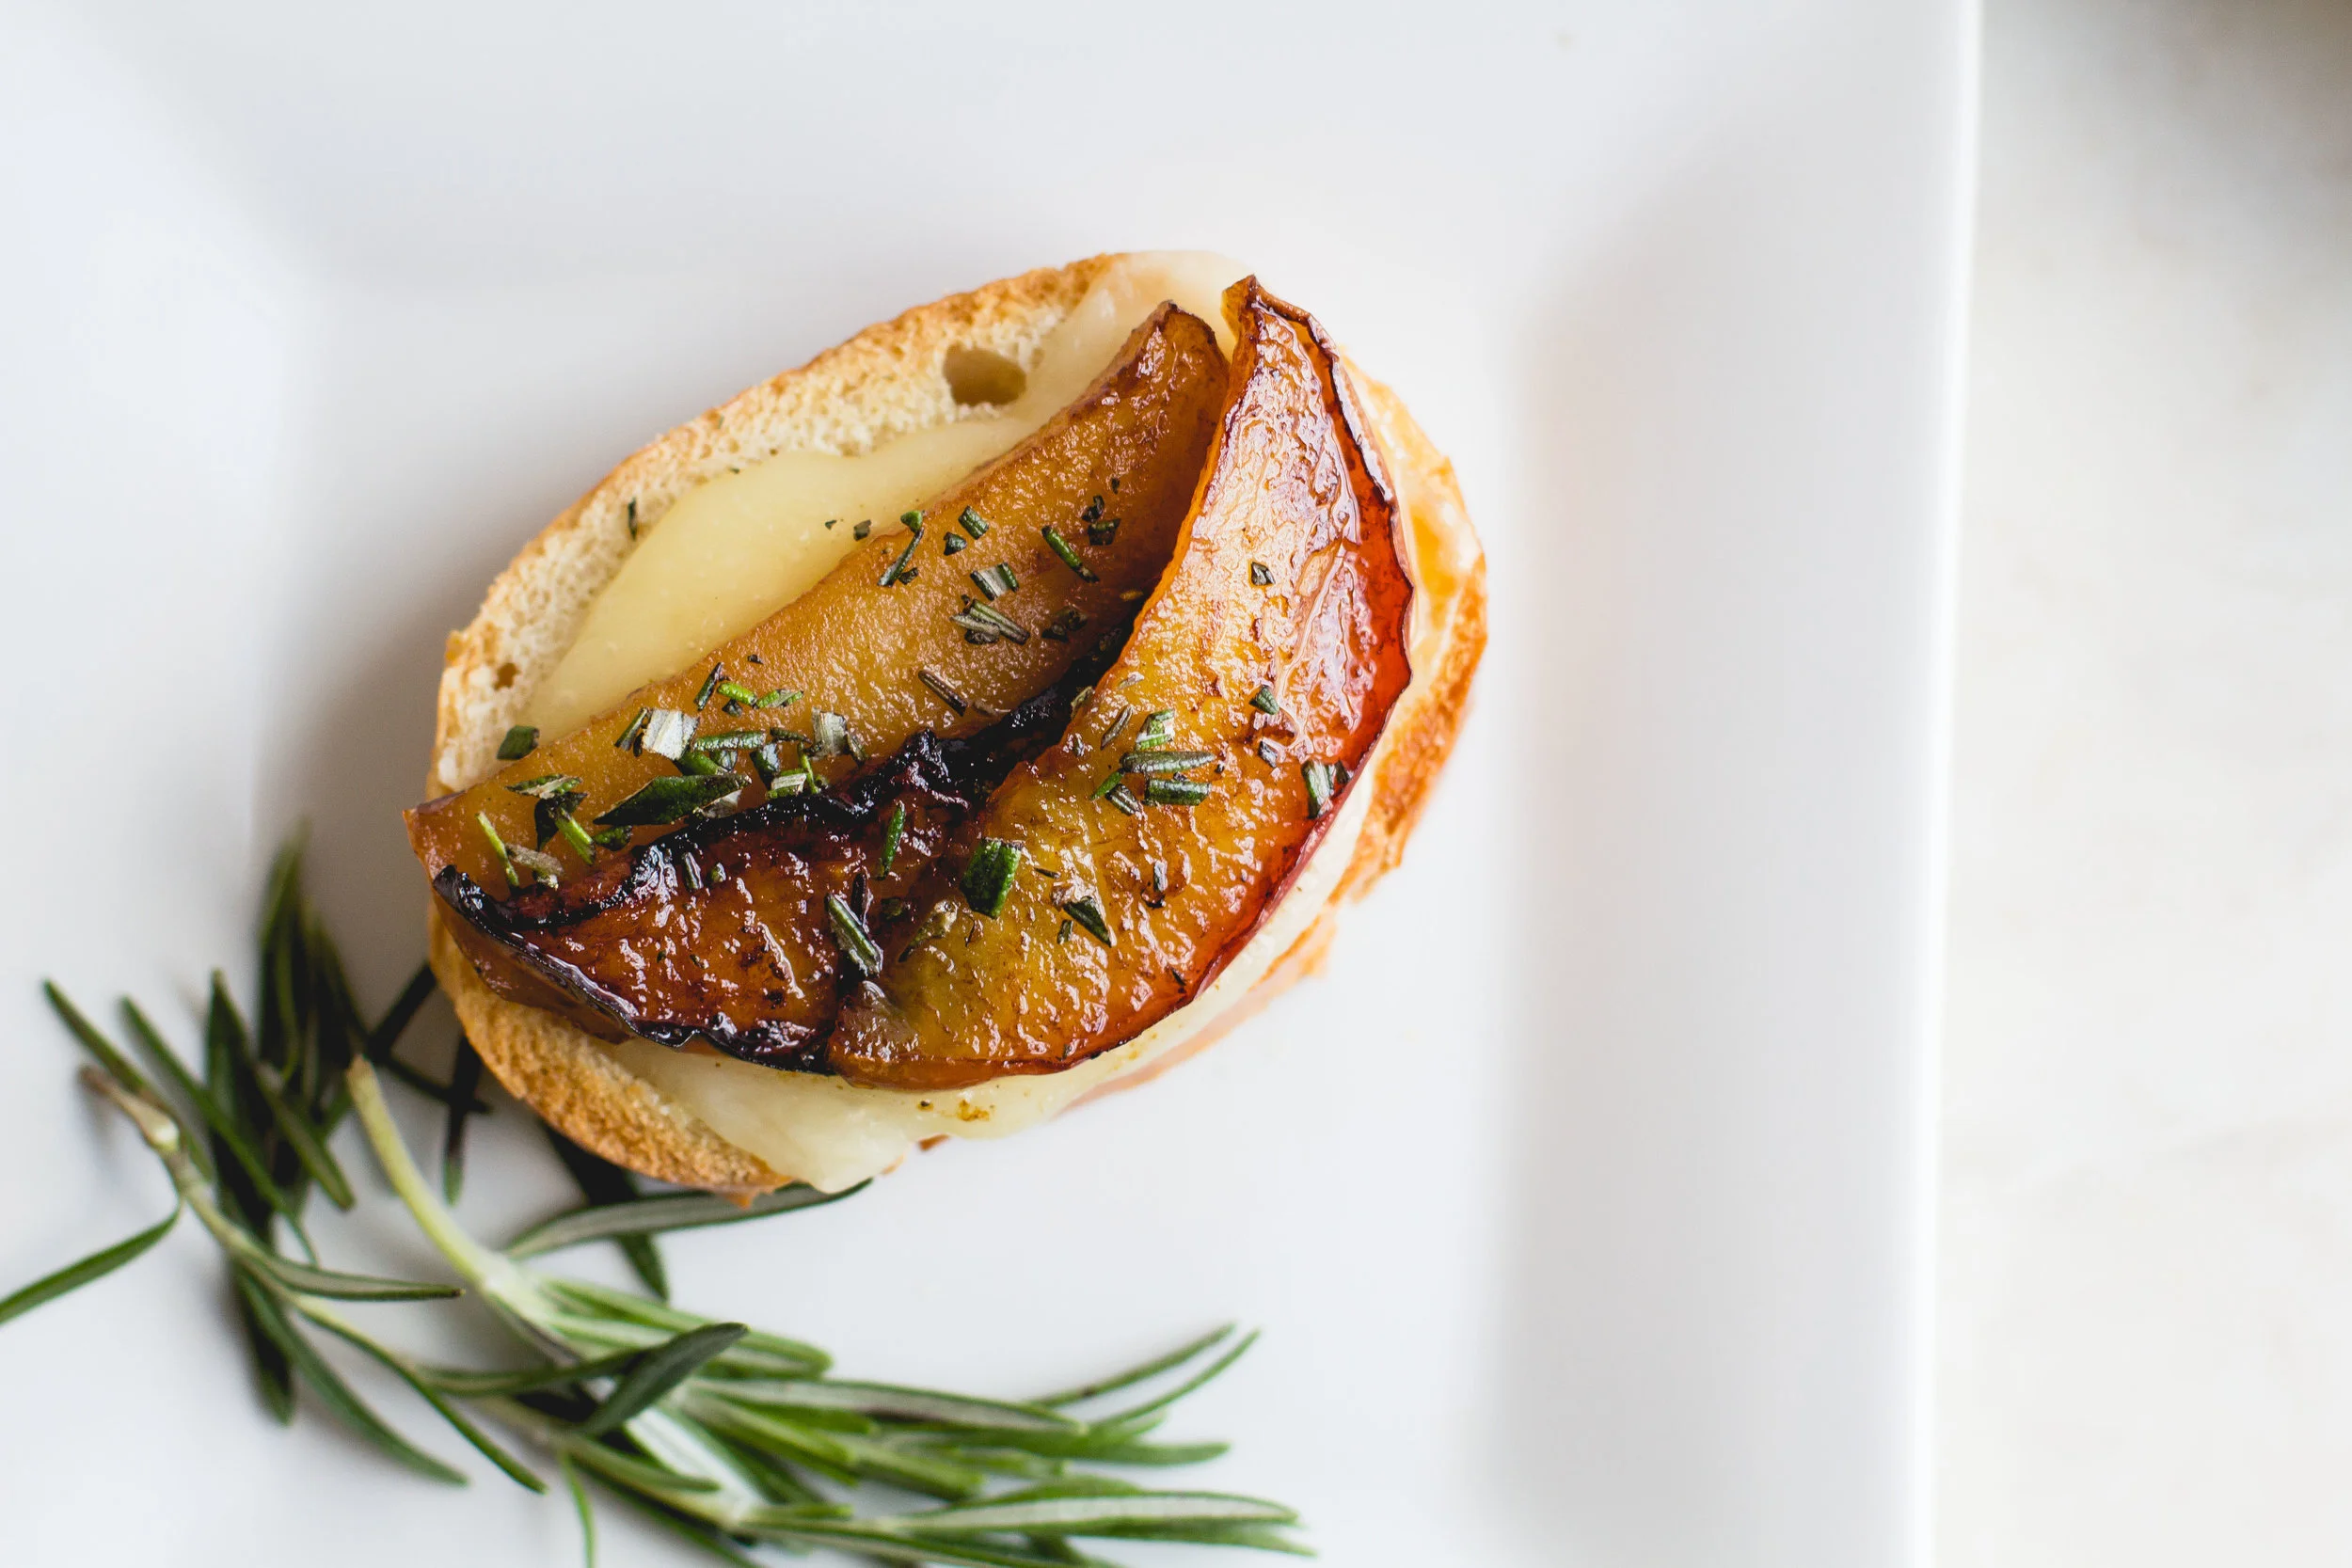
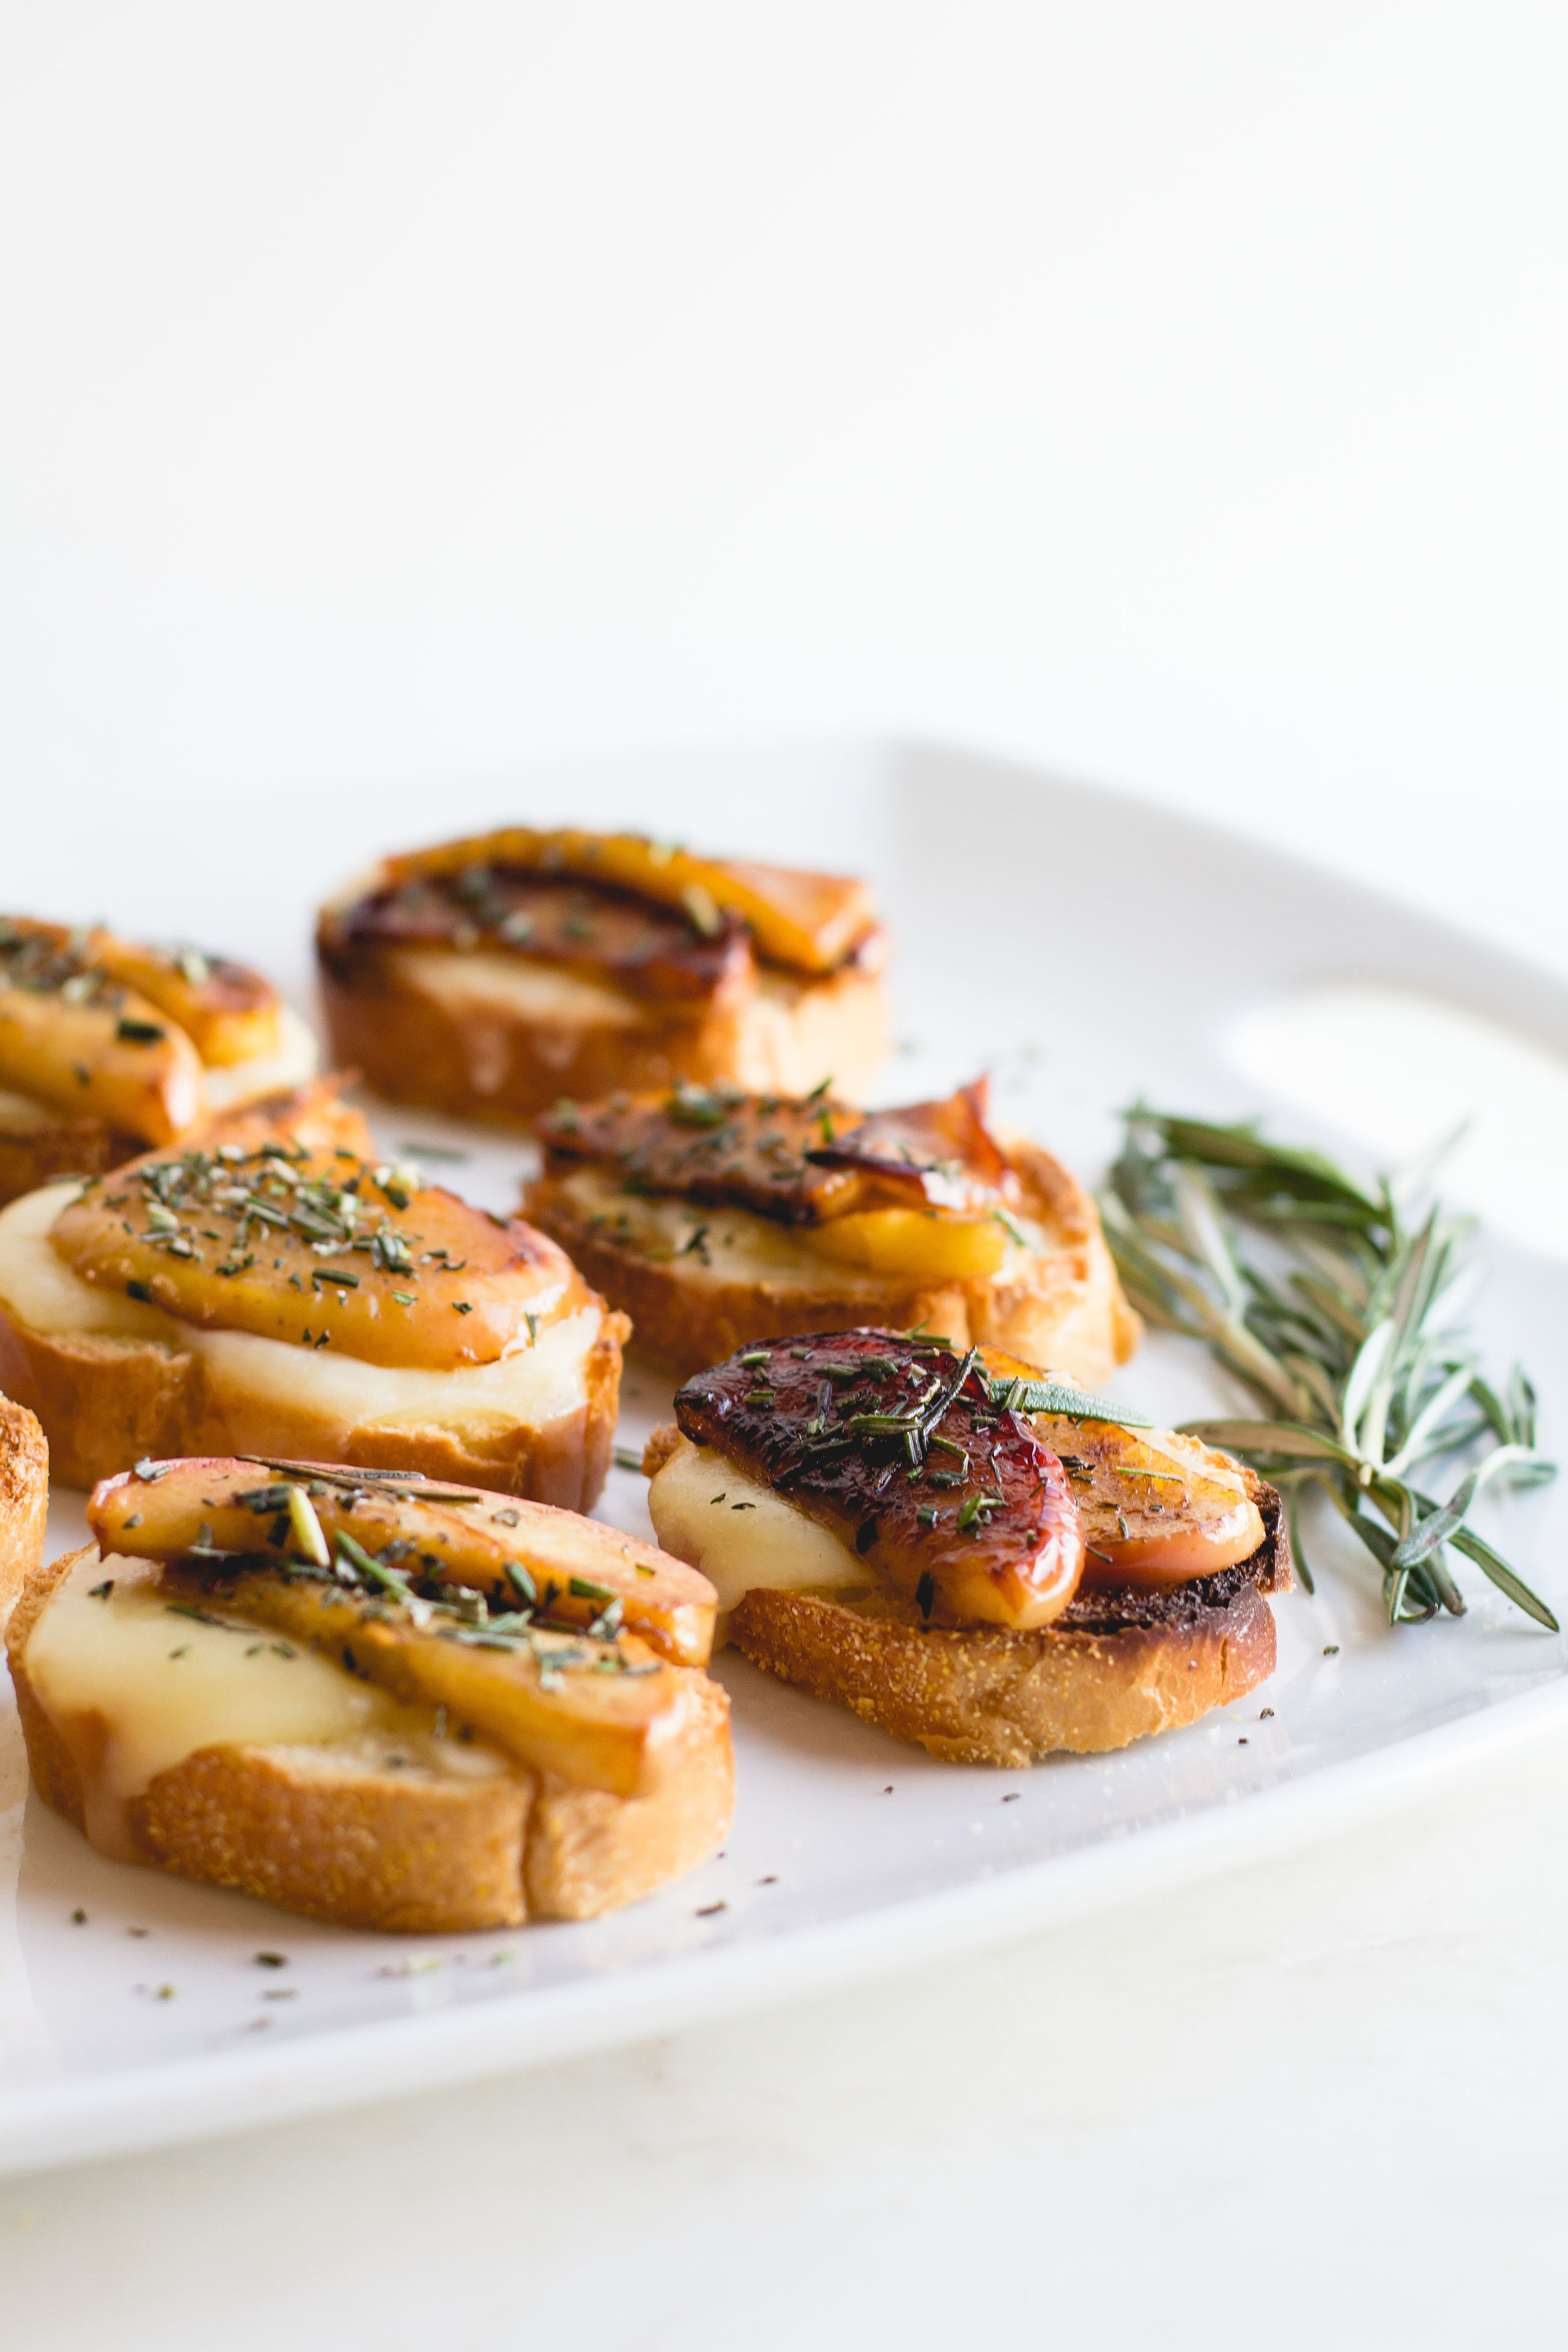
Crostini with Caramelized Apples, Fontina + Rosemary
Yields about 20-25 appetizers
2 medium apples
4-5 Tablespoons unsalted butter, divided
1 whole sprig of rosemary, plus 1-2 Tablespoons chopped fresh rosemary
¼ teaspoon kosher salt
1 baguette*
8 ounces Fontina cheese**
Prepare the apples by cutting each apple in half, removing the core and seeds, and then slicing each apple into ¼-inch thick slices.
Heat a large cast-iron skillet over medium-high heat. Add 3 tablespoons of unsalted butter, ¼ teaspoon salt, and 1 whole sprig of rosemary to the skillet. Heat for a couple minutes until the butter is melted and starts bubbling.
Reduce heat to medium, and add the apple slices to the skillet. Cook for about 10-15 minutes, turning and stirring occasionally. The apples are done when they are browned and tender.
While the apples are cooking, move an oven rack to the position closest to your oven’s broiler flame.
Preheat your oven to broil (to high if you have a high/low setting). Slice the baguette into ½-inch thick pieces (you’ll need about 20-25 slices total), and lay them out on a baking sheet. Lightly butter all the slices using the remaining 1-2 tablespoons of butter.
Thinly slice the Fontina, and top each piece of buttered bread with 1-2 pieces of cheese. Place the cheese-topped bread in the oven under the broiler flame, and broil for 2-3 minutes until the bread is toasted and the cheese is melted. (Keep a very close eye on the baking sheet so you don’t burn the bread and cheese! You may also want to rotate the baking sheet halfway through to ensure even cooking.)
Remove the bread from the oven. When the apples are done cooking, top each piece of bread with 1-2 apple slices, and sprinkle with fresh rosemary. Serve and enjoy!
*Note that this recipe may not use an entire loaf. That just means more bread to snack on while you cook!
**Fontina is an Italian cow’s milk cheese that melts really well. I’ve been able to find it at both Trader Joe’s, Aldi, and most other grocery stores. You can, however, substitute another cheese such as Gruyere or Gouda.
If you missed Part 1 of my "Behind the Scenes" posts, make sure to click here! You'll get to see photos (taken by Anna Guziak) of me making this recipe and setting up to photograph it.


